WANT CHEAP OYSTERS? HEAD TO THE BEACH.
There are plenty of good oyster spots in Seattle, but these days you’ll be paying around $3 or $4 per bivalve, sometimes more. This price tag reflects the fact that a lot of labor goes into growing, harvesting, transporting, storing, and finally shucking and serving everyone’s favorite gloopy little guys.
So why not cut out the middleman and harvest your own?
Seattle is one of the few places in the country within a short drive of an abundant supply of fresh, salty, delicious oysters waiting for you. All you have to do is slip on some boots, get out on the water, and start shucking your own.
A day spent harvesting oysters is incredibly satisfying. You spend time out on the water, learning the rhythm of the tide, getting muddy, and entering into an oyster-shucking flow state. Not to mention you get to scarf down some briny shellfish.
“It’s an excuse to go camping for the weekend or just spend the day out on the Hood Canal,” says Angela Shen, who runs Savor the Wild Tours, a company that offers oyster- and clam-digging experiences. “It doesn’t have to be a full day commitment.”
Here’s how to harvest oysters yourself in the Seattle area:
Get a license
First, you need a Shellfish/Seaweed License from the Washington Department of Fish & Wildlife (WDFW). You can go through the WDFW’s licensing website or visit an authorized dealer. You do need a physical permit while harvesting, so if you don’t want to wait for one through the mail or aren’t able to print a temporary license, you’re better off picking one up at a dealer. The Shellfish/Seaweed License costs $17.40 for Washington State residents for the harvest year, which runs from April 1, 2024, through March 31, 2025.
When purchasing your license, read up on the current state oyster harvesting rules and regulations. Here are a few key ones:
- Each harvester is allowed 18 oysters per day (oysters consumed on the beach count toward the daily limit).
- Each harvester needs their own pass.
- Each harvester must use a separate container.
- Oysters must be at least 2.5 inches measured across the longest part of the shell.
- Oysters must be shucked on the beach, and shells must be left at the same approximate tide height where they were gathered on the beach of origin.
Get the right equipment
Your top two pieces of gear will be an oyster-shucking knife and cut-proof gloves. For a more comfortable experience, consider adding waterproof boots, a few towels, a bucket, and camping chairs. If you plan on bringing some oysters home to cook, a cooler with ice and a container for the oysters is necessary to ensure they stay fresh.
While harvesting, you’ll be out in the elements without any cover, so plan your clothing choices and sun protection accordingly.
Find a beach
There are plenty of beaches around Washington State where you can harvest oysters, all with slightly different seasons and harvest profiles. You can search the WDFW website for a beach or use its interactive map to see which are open and safe to harvest. The WDFW checks water quality and safety daily, so look at this map on the morning you plan on harvesting.
Oyster harvesting is a year-round activity. But if you want to slurp down oysters right on the beach, you should stick to the colder months, “The water temperature should be below 55 degrees Fahrenheit. Generally, October to April is the best time to eat oysters off the beach,” Shen says. “Other than that, you’ll want to take them home for cooking.” April is considered one of the best months for harvesting since low tide occurs during daylight hours, and the water is still plenty cold. You can still harvest year-round, just make sure to keep the oysters on ice while you transport them home for cooking.
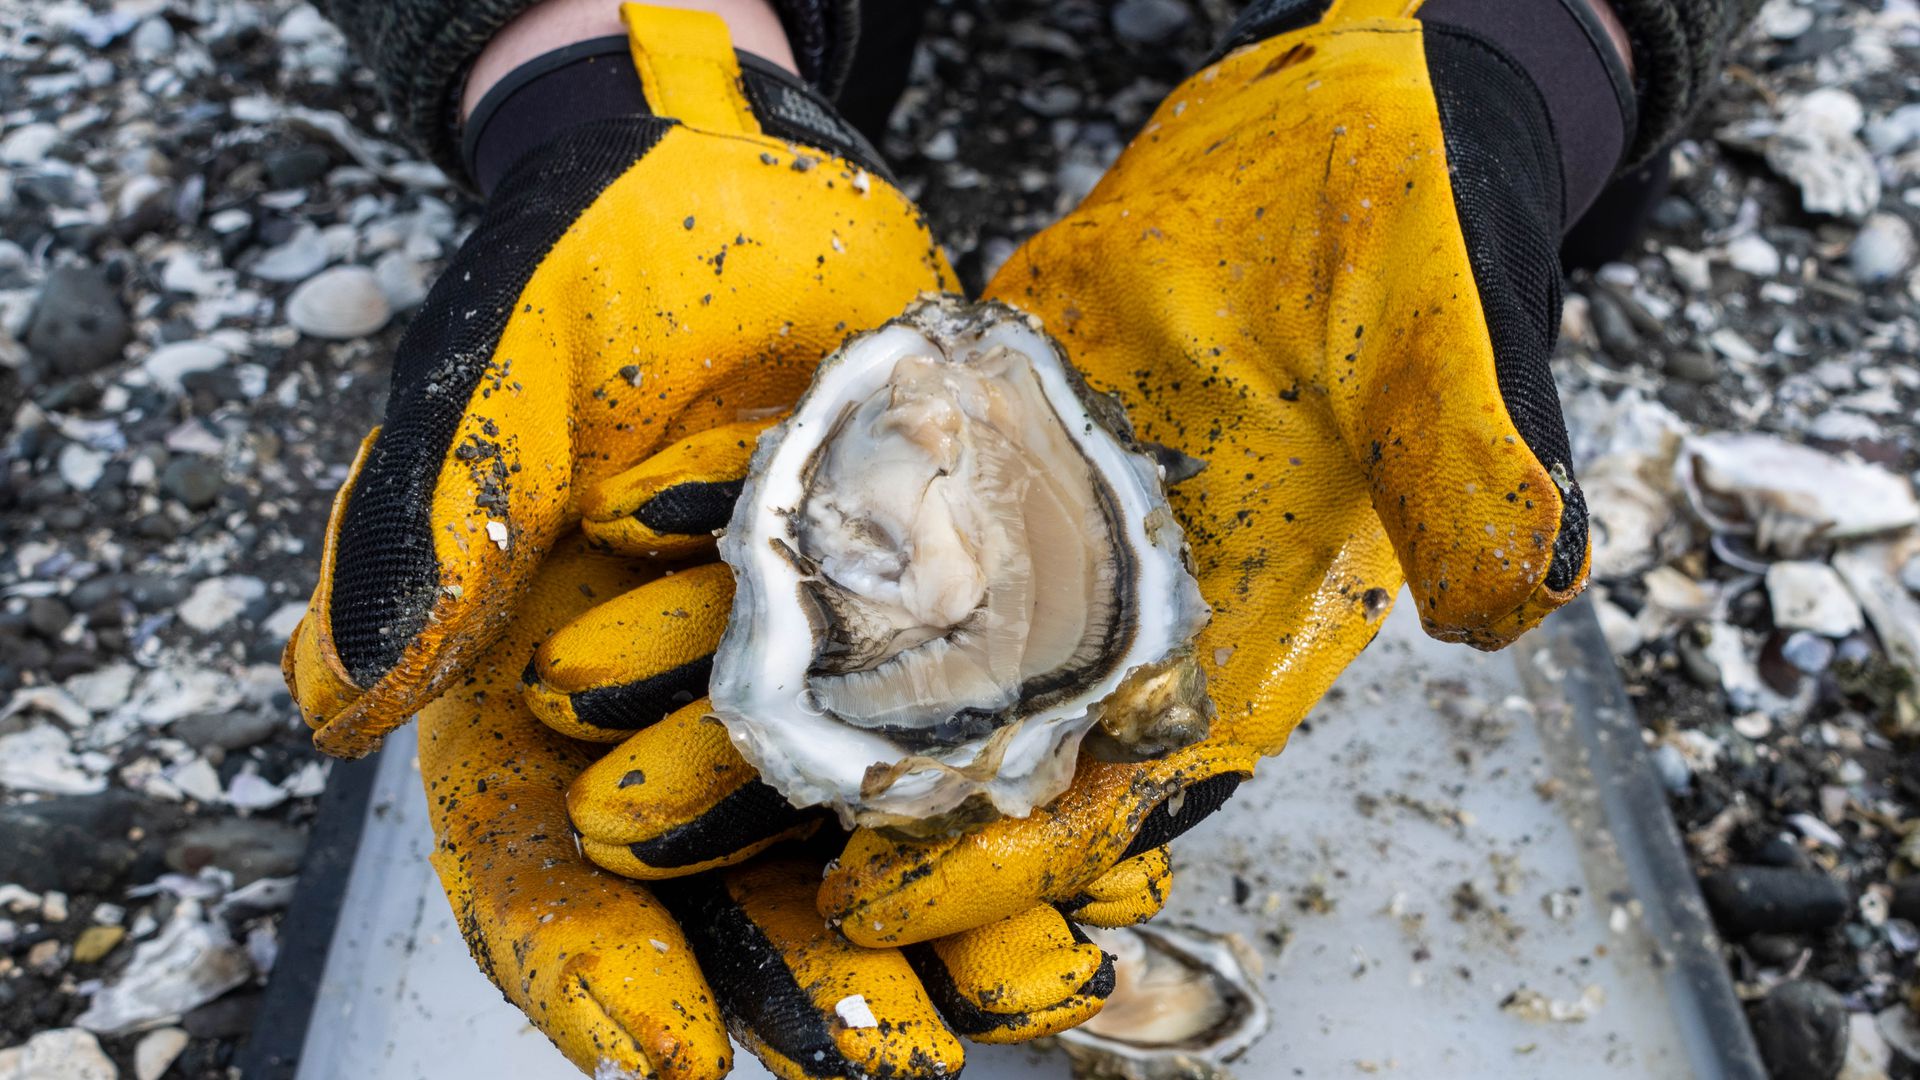
Get shucking
For the most part, you’ll be harvesting the Pacific oyster — a gnarly, oblong-shaped oyster species with a gray, irregular shell edge. During low tide, the oysters lie on the beach, some alone and others in small clusters. All you have to do is walk to where the tide meets the beach to collect them.
As you find oysters, don’t let them sit in your bucket for too long.
“You want to minimize the amount of time the oyster is exposed to air.” Shen says. “Anything out of water for more than two hours isn’t safe to eat and will dramatically increase your chances of getting sick.” Bringing a bucket to fill with cold seawater can keep the oysters fresh and help remove dirt or sand before shucking.
Once you’ve collected some oysters, it’s time to open them up. There’s a learning curve, and it might seem intimidating at first, but it gets easier with practice. First, start by identifying the “lid” (the flatter side), the “cup” (the more rounded bottom), and the “hinge” (the point where the two sides meet). On a flat surface, place the oyster with the lid facing up, insert the oyster knife at the hinge, and twist until the shells slightly pop apart. Then, slide the blade along the shell to sever the abductor muscle that holds the two sides together. Once you’ve loosened it enough, peel the two sides apart.
Eat the oysters on the beach or place the meat in a container on ice for transport. It’s important to note that the shells must stay on the beach, where they can provide a habitat for baby oysters. By leaving the shells on the beach, you also help prevent transferring invasive shellfish pests and diseases from one location to another.
If this all seems overwhelming, consider using a company like Savor the Wild Tours for your first time. They’ll handle most logistics and help guide you through your first harvesting experience.
2024-04-15T21:19:01Z dg43tfdfdgfd